 FISHINGCRITIC
KNOT GUIDE
How to tie a improved clinch knot
An eye attachment for mono or fluorocarbon. This is not our plain-braid recommendation.
FishingCritic is research-led, using maker data and published sources. We have no hands-on test results for this edition.
Where should you use it?
Line: mono, fluoro. Use: hook, lure. The standing line goes to the reel; the tag is the free end. A bight is a folded section of line.
Standing line
Tag end or working bight
A white gap at a crossing shows the strand passing over.
How do you tie it step by step?
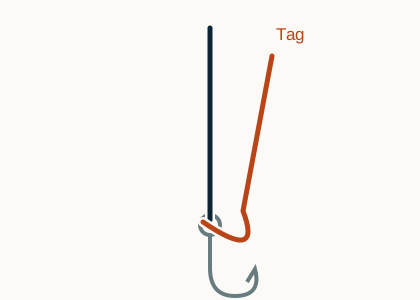
01 Pass the tag through the eye. Bring it back beside the standing line, leaving room to work. 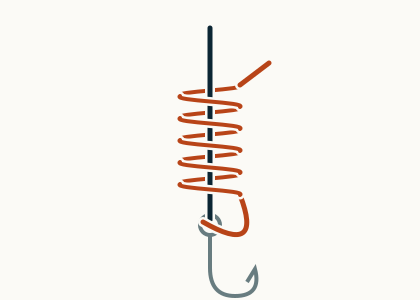
02 Wrap the tag around the standing line 5–7 times, working away from the eye. Keep the small eye loop open. 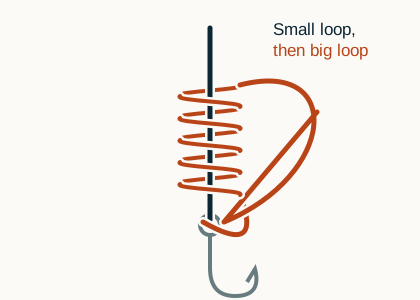
03 Return the tag through the small loop by the eye. Then pass it through the large loop formed by that return. 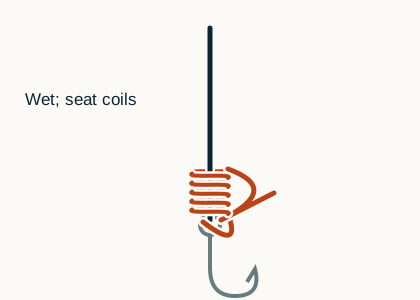
04 Wet, then draw the wraps down slowly while controlling the tag. Seat against the eye and trim.
What should you check before casting?
The final return through the large loop is the improvement. Skipping it makes a different knot.
Wet the line before tightening. Pull firmly on the finished connection, inspect the wraps, and retie if they overlap or the line is damaged. No knot-strength percentage is claimed.
Where do these facts come from?
The links identify source URLs and check dates. The source data records access limits.
TAKE IT TO THE WATER
Want six knots in your pocket?
Free knot cards: one knot per page, plus a rig cheat sheet. Print the PDF before your next trip.